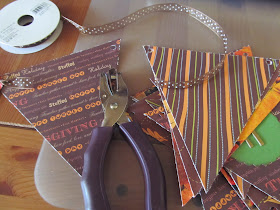
Here's what you will need:
- 4 pieces of 12x12 Fall or Thanksgiving printed paper or cardstock
- 1 Piece of coordinating cardstock
- Letter Stickers
- Ribbon
- A Paper Punch (you can also just cut circles)
- Scissors
- Hole punch
- Adhesive
- Ink (optional)
Cut your 4 pieces of printed paper into equal 6x6 squares - you will have 16 squares in total, 4 of each pattern.
Once you have your 16 squares, cut on the diagonal from each top corner, to form a triangle with a 6 inch top flat edge. (I give the extra pieces to my kids - they have a box of "shapes" to use for projects)
Once you have your 16 triangles (you can adjust this to suit your space - 16 works on my mantle) Pick a solid color cardstock to use to mount your letters. (I went with the green)
I used a scalloped edge paper punch to cut my circles. Use what you have & keep it simple. Cut a circle for each letter. I also inked the edges of mine for a little depth.
Arrange your triangles into your desired pattern and attach the circles to the ones you want your letters on.
Stick on the Letters (check your spelling! =) )
Next, you are going to punch a small hole in each upper corner.
Cut ribbon to the desired length. . .I cut it about 5 inches, and have the corners overlap. Tie a knot to connect each triangle.
That's all there is to it. Now you can hang it on a mantle, over a door frame, or on a wall above your dining room table. I used a little embroidery thread on the two end hole to hang it.
catch you soon -


I love this banner Hillary. Thanks so much for sharing it! And...it looks gorgeous hanging over your fireplace!
ReplyDeleteYour mantle is adorable. The banner was the perfect addition :). Thanks for the tutorial!
ReplyDelete